What is Python
Python is a popular programming language that is easy to learn and widely used for web development, data analysis, artificial intelligence, scientific computing, server management, and more. Python is also a great choice for automating tasks. Writing Python scripts is a popular method of performing server maintenance, network diagnostics, machine-to-machine communications, and pre-processing raw data.
Python is an interpreted language. Python code is executed line by line. This makes Python easier to write and read, but it is often slower and more resource intensive than compiled languages like C/C++. Another downside to Python being interpreted is that an error in the code is not discovered until the code is executed. A program can run for a long time and not execute every line of code.
If you are familiar with other programming languages but are new to Python, here are two important characteristics to keep in mind:
- Python is dynamically typed. You don't need to declare the type of a variable*
- Python will automatically determine the data type of a variable based on the value assigned to it. This makes Python code more flexible and easier to write, but it can also make it harder to debug.
* a variable is a named storage location that can store a value. The value can be changed during the execution of the program. Simple variables include integers, floating-point numbers, and strings. More complex variables include lists, dictionaries, and objects.
Python is whitespace sensitive. The indentation of your code matters. In Python, you use whitespace (use spaces == please don't use tabs) to indicate blocks of code. This makes Python code more readable, but it can also make it harder to write if you're not used to it.
Python is case-sensitive. my_data is not the same as My_Data.
Naming conventions exist for Python. There are preferred formats for naming variables, functions, classes, and libraries. When you are writing Python just for you these conventions do not matter. When you share your code and work on programs with a group or team, it is helpful to have consistency across all of the code.
The workshops will introduce the concepts of variables, functions, and classes.
For ad-hoc learning, I recommend tutorials and examples on W3Schools. They cover the basics of Python syntax, variables, conditionals, loops, functions, and more.
For more structured learning, I have explored codecademy.
Tip: Once you have the fundamentals of Python, you might want to give GitHub Copilot a try for a virtual coding partner. Of course, GitHub Copilot is not infallible. But, as a coding assistant, it can save a lot of time! Visual Studio Code is a powerful coding tool with support for extensions including GitHub Copilot.
For this workshop, all of the code and commands we use are the same for Python and CircuitPython.
The only thing needed to complete the _Intro to Python* and More Python workshops is thonny. The the Explorer Badge is only needed for the Hardware Hacking workshop.
Developer Tools for Python
These workshops use the Thonny IDE. It's works on Windows, MacOS, and Linux (including Raspberry Pi).
When using thonny with MicroPython or CircuitPython, the serial console is built right in so you get immediate feedback from your board's serial output.
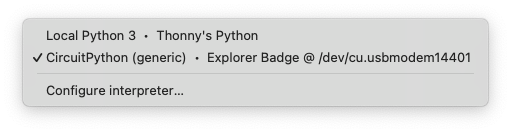
For the Python workshops, we will use the built-in Local Python 3 environment. The active environment is shown in the status bar at the bottom of the Thonny window. Clicking it will allow changing environments.
Alternative: You may prefer to use the VS Code development environment with the extensions for Python, CircuitPython, the Serial Monitor, and GitHub Copilot. VS Code is a rich integrated development environment (IDE) which supports many programming languages and file formats. It's written in JavaScript and works on Windows, MacOS, and Linux (including Raspberry Pi). The Serial Monitor extension requires you manually activate it to get the output from the board.
Python Coding
CircuitPython and Python are both programming languages, but they have some differences. - Python is a general-purpose programming language that is used for a wide range of applications. - CircuitPython is a variant of Python that is optimized for microcontrollers and embedded systems. Another difference is that CircuitPython has a simple API for accessing hardware components such as digital I/O, communications protocols, analog (voltage) input, and libraries for a wide range o hardware devices.
When we write Python code for our computers, we would need to make sure the Python runtime is installed. (thonny includes the Python runtime). When we write CircuitPython, the runtime and basic libraries are pre-installed as firmware on the board.
For the workshops, we are using the Thonny IDE which has a Python runtime built-in.
Let's write some Python!
Python Interactive Interpreter
We will start with the Python REPL (Read Evaluate Print Loop). The REPL allows lines of code to be executed immediately.
REPL is an interactive shell that allows you to run Python code and see the results immediately. When you enter a command at the REPL prompt, it reads the command, evaluates it, prints the result, and then loops back to wait for the next command.
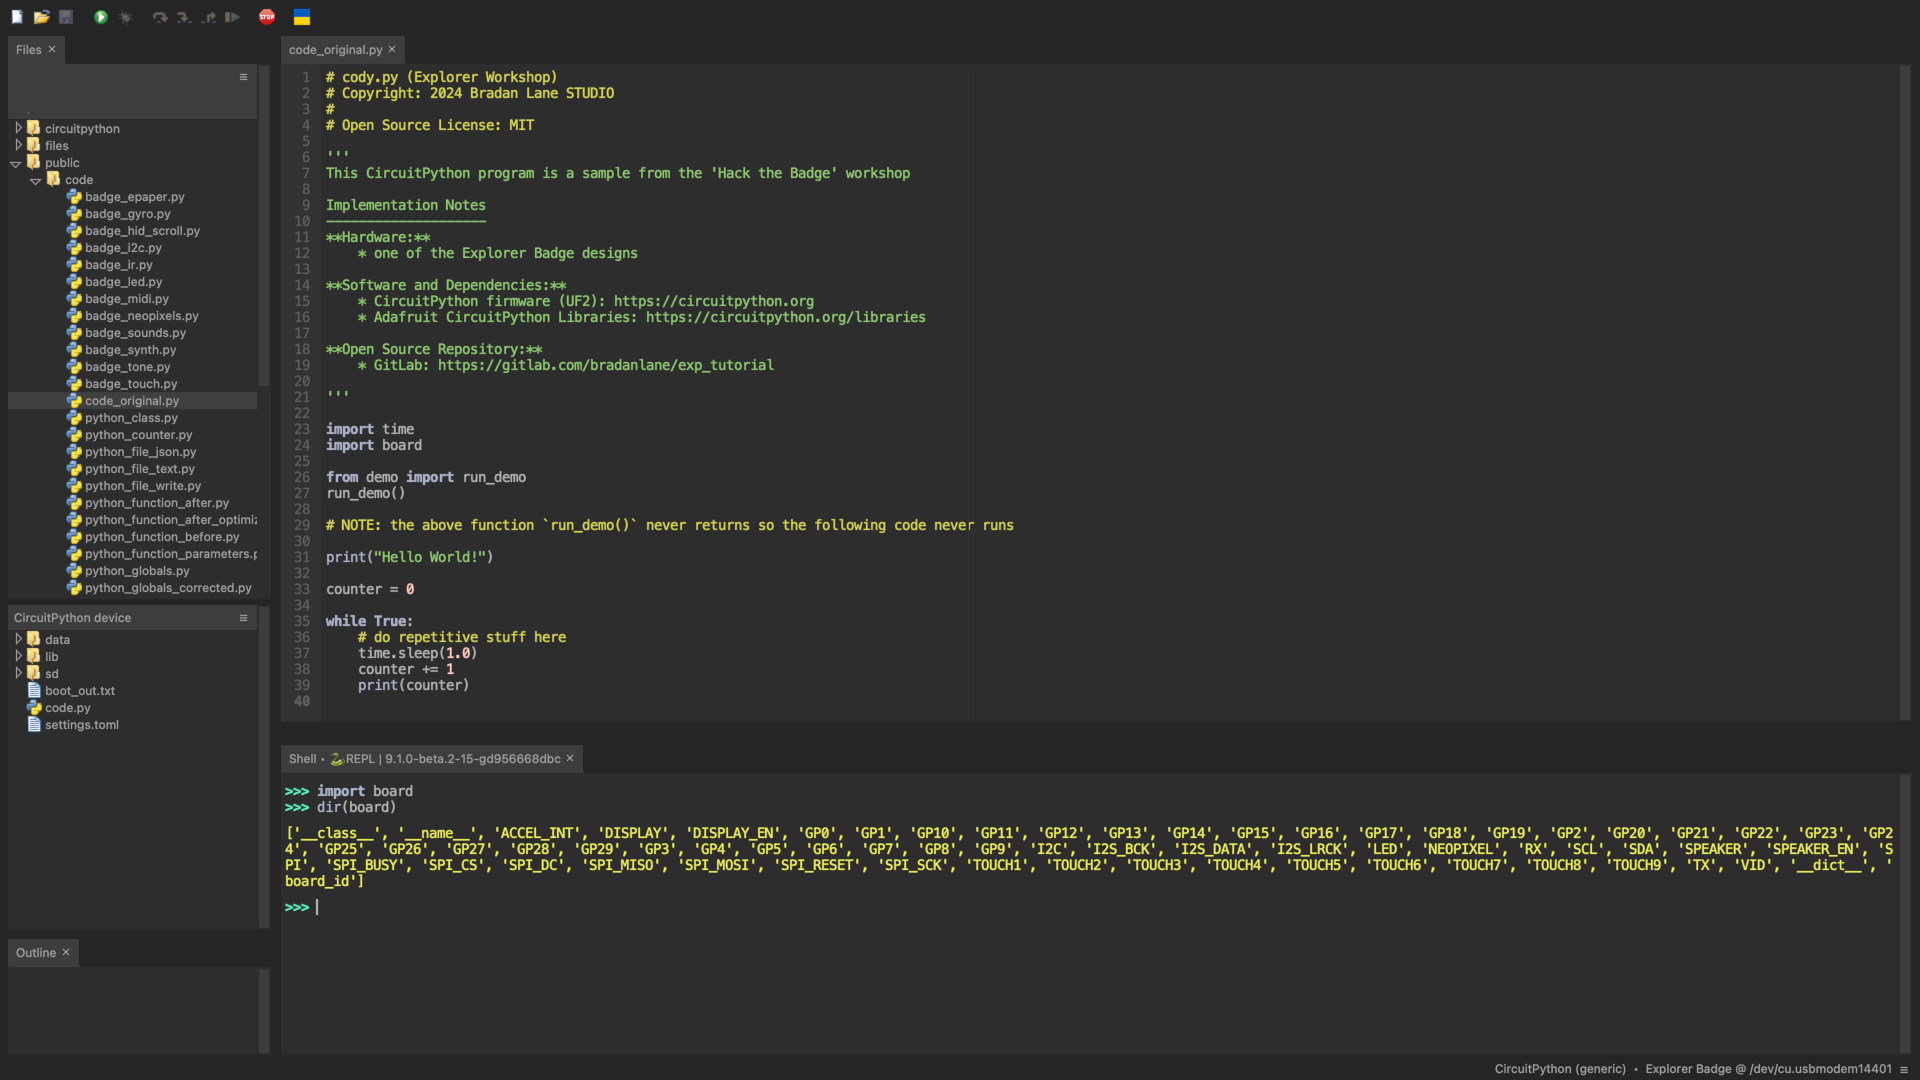
From the Thonny Editor, use the "View -> Shell" menu option. A section will open at the bottom of the window and should look something like the image above.
Print Function and Variables
Let's try a few simple exercises.
The print() function is used to output content to the terminal. With Python, the default is the active command window. With CircuitPython this is the serial terminal.
Try the following: >>> print("Hello World!") in the serial window. The result should be the text Hello World! on the line right after you press the ENTER key.
Tip: Python strings may be delineated with either single quotes or double quotes. Which ever you start the string with, is what you must end the string with. If you need to use the same character within the string, you need to escape it using a backslash.
The print() function can output any variable. Here are examples of printing other variable types ...
print("Hello World!")
print("\"Hello\" World!")
print(42)
print(3.14159265358979323846)
print("Adafruit was founded in", 2005)
That last one is and example of the print() function concatenating multiple parameters into a single output.
There are more options for the print() function. Let's look at them in the context of data variables.
Remember, "Python is dynamically typed". You don't need to declare the type of a variable before using it. You can also change what type of data is stored in a variable.
>>> data = 42
>>> print(data)
42
>>>
>>> data = "hello"
>>> print(data)
hello
>>>
>>> data = "hello " + 42
TypeError: can only concatenate str (not "int") to str
>>>
>>> data = "hello " + str(42)
>>> print(data)
hello 42
>>>
Python has multiple ways of creating formatted strings.
>>> val1 = 42
>>> val2 = 3.141592
>>>
>>> print("Value1 = %d and Value2 = %3.2f" % (val1, val2))
Value1 = 42 and Value2 = 3.14
>>>
>>> print("Value1 = {:d} and Value2 = {:3.2f}".format(val1, val2))
Value1 = 42 and Value2 = 3.14
>>>
>>> print(f"Value1 = {val1} and Value2 = {val2:3.2f}")
Value1 = 42 and Value2 = 3.14
>>>
>>>
There are times where one method is more convenient that another. The oldest method - using %<datatype> is similar to the C-Language printf(). In the middle is the {} parameter substitution solution using string.format(). The most recent "preferred" formatting solution is the f-String which has some similarities to C++ and C#. It integrates the variables right in-line with the rest of the string, making it more readable.
A good rule of thumb is to use the method that makes the code the most readable for you and your team. And, in a team or a group project, consistency is key.
... Let's shift from using REPL to writing a Python program ...
Python Program
Python: The program name can be any string name and the extension is .py.
CircuitPython: The program file name is code.py. You will find this file pre-created on a CircuitPython board.
Launch thonny. Check the status bar at the bottom of the window to ensure the active environment is Local Python 3.
Hello World
This is the typical first program in Python:
1 2 3 4 5 6 7 8 9 10 11 12 13 14 15 16 17 18 19 20 21 22 23 24 25 | # (Explorer Workshop) # Copyright: 2024 Bradan Lane STUDIO # # Open Source License: MIT ''' This CircuitPython program is a sample from the 'Python' workshop Implementation Notes -------------------- **Hardware:** * computer **Software and Dependencies:** * Python 3.x * Thonny 4.x IDE **Open Source Repository:** * GitLab: https://gitlab.com/bradanlane/exp_tutorial ''' print("Hello World!") print("Good Bye") |
Load the program and use the Thonny RUN toolbar button to execute the code. The toolbar is near the top of the Thonny window and RUN is depicted by a green circle.

Quick Tip: The # pound symbol indicates a comment. Anything following it is ignored by the Python interpreter. A series of three single or double quotes indicates a comment block. Everything until the next series of the three of the same character is ignored by the Python interpreter.
Now, let's focus on the relevant section ...
25 | print("Good Bye") |
In this code, we use the print() function with a simple text string "Hello World!".
Exercises
Now, let's work through a series of exercises which build on our simple program.
In-line code
Let's modify the "Hello World" example to print out the message every 1.0 seconds forever.
The forever part is accomplished with a while True: loop.
The while statement creates a loop (execute some code repeatedly). The loop code will execute the indented code as long as the condition is True. Since True is always True, this loop will run forever. The loop could use a variable to control the number of times the loop is executed.
Within the while True: loop, use the print() function to output the string message.
Remember, "Python is whitespace sensitive. The indentation of your code matters." For your sanity and the sanity of others, always indent with spaces - never use tabs!
The indentation indicates the lines of code to execute inside the while loop.
The indented code repeatedly as long as the condition is True and True is always True which means this while loop will loop forever.
CircuitPython:`A ``while True:` loop is very common on microcontrollers.
It means the code will run as long as the microcontroller has power.
The program also needs to understand the passage of time. There is a build-in library to help with this. Built-in libraries are included with the Python runtime.
To use a built-in library, you use the import instruction.
There are different ways to use the import instruction:
- import a_lib
- import a_long_named_lib as short_lib
- from a_lib import a_thing, b_thing
The time library provides several convenient functions for measuring time and other time duration functions. The two most common functions are time.sleep() and time.monotonic(). - The time.sleep() function will pause the program for a specified number of seconds. - The time.monotonic() function returns the number of seconds since the program started.
CircuitPython:`The ``time.monotonic()` function is not available in CircuitPython. There are a few ways to measure time in CircuitPython. When you need perform an action after a period of time, use the SimpleTimer library. (more on this in the Hack the Badge Workshop)
Save the program and use the Thonny RUN toolbar button to execute the code.
The result should be th program will output Hello World! once and then every 1.0 seconds, it will output the string message.
Tip: Use the STOP toolbar button to stop the program.
Hello World!
Our Message
Our Message
Our Message
Our Message
...
Now, create a new variable counter and assign it the value 1. Within the while True: loop, increment counter and add it to the print() function which is outputting the simple string message. Use whatever method you prefer for outputting the string message and the counter value.
The break instruction will break out of the inner most loop - in our example, this is the while True: loop.
Questions: - Where did you place the initial counter = 1 code? - Does the output show an incrementing counter?
23 24 25 26 27 28 29 30 31 32 33 34 35 36 | import time print("Hello World!") counter = 1 while True: print(f"Counter = {counter:d}") time.sleep(1.0) counter += 1 if counter > 10: break print("Good Bye") |
Here is the result:
Hello World!
Counter = 1
Counter = 2
Counter = 3
Counter = 4
...
Tip: In addition to built-in libraries, there are 3rd party libraries. These must be installed before they can be used.
Python: On a computer running Python, the most common method of installing 3rd party libraries is with the python3 -m pip <library_name> command.
CircuitPython:`Library files or folders are copied to board and often stored in a folder called ``lib`.
Make a function
In-line code is code that is executed as the Python interpreter is loading the code from the top. However, when the in-line code needs to be used multiple times (or when it gets to be large and difficult to follow) it is handy to make a function to encapsulate the section of code.
Let's start with the following code:
25 26 27 28 29 30 31 32 33 34 35 36 37 38 39 40 41 42 43 44 45 46 47 48 49 50 51 52 53 54 55 56 57 58 59 60 61 62 | counter1 = 1 counter2 = 1 counter3 = 1 selector = 1 while True: # do repetitive stuff here print(f"Selector = {selector:02d}") print(f"1st Counter = {counter1:02d}", end=" ") # print a bunch of dots for i in range(counter1): print(".", end="") print() # print a line break counter1 += 1 if selector % 2 == 0: print(f"2nd Counter = {counter2:02d}", end=" ") # print a bunch of dots for i in range(counter2): print(".", end="") print() # print a line break counter2 += 1 if selector % 3 == 0: print(f"3rd Counter = {counter3:02d}", end=" ") # print a bunch of dots for i in range(counter3): print(".", end="") print() # print a line break counter3 += 1 selector += 1 print() # print a line break if not (selector % 40): # end after 40 break print("Good Bye") |
Python: The code is inside our while True: loop and will run forever.
Use the Thonny STOP toolbar button to stop executing the code.
You will see there is an extra parameter to some of the print() calls. Adding , end="" instructs the print() function to end each print output with the specified string rather than the default new line.
We have added the if statement. This is similar to the while statement except it is not a loop. Remember, Anytime a line of python ends with a colon ``:``, it indicates the following indented code is related to the non-indented line.
In the above code we are using the if statement to test for specific conditions.
The == means to test the left side to the right side and determine if the results is True or not.
- Here are some examples of comparisons:
- 42 == 42 is True
- 42 == 40 is False
- 42 == "42" is False
- 42 == int("42") is True (in this example, we converted the string ``"42"`` to an integer before comparing)
The indented code, following the if will only execute when the condition is True.
In the code the condition we are testing for uses the modulo operation to execute code every 2nd and every 3rd increment of our selector variable.
The mathematics operation modulo which is represented with the % percent symbol. If you are not familiar with the modulo operation, it just means "the remainder of a division". When the remainder is zero it means the number is divisible by the divisor with zero remainder. For example: 42 % 10 results in a value of 2.
OK, with that little excursion out of the way, let's create a function to reduce the duplicate code.
In python, a function starts with the label def and here is the full form:
def function_name(parameter1, parameter2):
    # do some stuff
    # do some more stuff
    # optionally return a value
We can make a function that performs the print statements and increments the counter.
25 26 27 28 29 30 31 32 33 34 35 36 37 38 39 40 41 42 43 44 45 46 47 48 49 50 51 52 53 54 55 56 57 | def print_counter(msg, count): print(f"{msg} Counter = {count:02d}", end=" ") # print a bunch of dots for i in range(count): print(".", end="") print("") # print a line break return count + 1 counter1 = 1 counter2 = 1 counter3 = 1 selector = 1 while True: print(f"Selector = {selector:02d}") # do repetitive stuff here counter1 = print_counter("1st", counter1) if selector % 2 == 0: counter2 = print_counter("2nd", counter2) if selector % 3 == 0: counter3 = print_counter("3rd", counter3) selector += 1 print() # print a line break if not (selector % 40): # end after 40 break print("Good Bye") |
Using the List datatype
There is still a lot of similar code. Is there a better way?
Since our program is running code on three variables of the same type (integers) and we are performing similar tasks on each one, we can switch from individual variables to a list.
A list in Python is represented with brackets []. More on lists and other datatypes in the next workshop.
Once we have a list, we can repeat our code using a for loop. The for loop is similar to the while loop but is used to repeat code some number of times. One way to establish the number of times to loop is with the range() function which will generate a value within a range each time it is called. Rather than try to explain the use of the for loop with range(), let's just look at the code.
If we change our counters to a list, and loop through the list, we end up with the following code:
25 26 27 28 29 30 31 32 33 34 35 36 37 38 39 40 41 42 43 44 45 46 47 48 49 50 51 | def print_counter(msg, count): print(f"{msg} Counter = {count:02d}", end=" ") # print a bunch of dots for n in range(count): print(".", end="") print("") # print a line break return count + 1 counters = [1,1,1] labels = ["1st", "2nd", "3rd"] selector = 1 while True: print(f"Selector = {selector:02d}") # do repetitive stuff here for i in range(3): if not selector % (i+1): # test with 1,2,3; index the lists with 0,1,2 counters[i] = print_counter(labels[i], counters[i]) selector += 1 print() # print a line break if not (selector % 40): # end after 40 break print("Good Bye") |
Conclusion
If you have never programmed in Python, this workshop has introduced a lot of new content. The best way to get comfortable with all of this material is to keep writing code (and ask questions).
Here are a few useful things we did not cover ... yet 😉:
- Input
- Command line parameters (not available in CircuitPython)
- Reading from a file (plain text and formatted files line JSON)
- Convert between data types (we did cover converted from string to integer)
We already mentioned the tutorials and examples on W3Schools.
You can also get some great tips and ideas using one of the on-line chat AI tools. Understand that the chat AI tools make mistakes so any code they generate may not work. That said, they do make it easy to generate examples.
AI Prompt: generate a python program which prints out prime numbers up to 1000